Hey everyone, it’s Jake from the post-installed embedded plates team here — been getting so many questions lately from contractors, engineers, and even building managers about how we actually get these plates up in high-rises without messing anything up. I see a lot of folks overcomplicating this, or skipping the small steps that make the whole job go smooth (and safe). Today I’m breaking it down real, no-fluff style — just what you need to know, straight from someone who’s sold these plates and walked through dozens of installs on buildings that tower over city skylines. Post-installed Embedded Plate
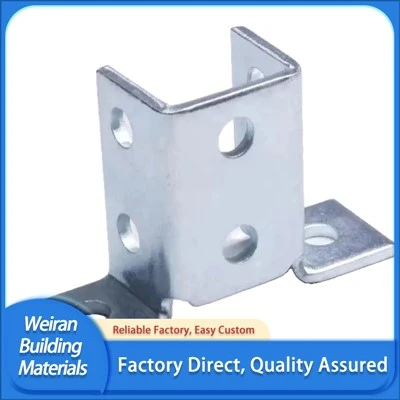
First off, let’s get one thing straight: post-installed embedded plates aren’t your typical pre-cast plates that get set into concrete during the pour. We bolt these on after the structure is already up — perfect for when you missed a design step, need to add a later component, or retrofitting an old building to meet new codes. But high-rises are a whole different beast compared to low-rises. The weight loads, wind forces, and concrete quality can vary from floor to floor, so cutting corners here isn’t an option. I’ve seen guys rush this job and end up with plates that don’t hold, or concrete cracking that leads to pricey fixes later. Don’t be that guy.
Let’s start with pre-install prep — this is where 90% of the success lives, and where most people waste time. First, you’ve gotta know what you’re working with. That means testing the concrete, not just taking the architect’s word for it. On high-rises, the core concrete and the slab concrete? Different mixes, sometimes different ages. I always recommend using a Schmidt hammer (that’s the little concrete tester gun) to check compressive strength. Aim for at least 30 MPa for post-installed plates — anything lower and your anchors won’t grip right, period. I’ve had a client tell me “our concrete is way better than that” until we tested it and found it was only 22 MPa on the 12th floor. Saved ’em from a disaster.
Next, marking the plate location. High-rises have finished ceilings, ductwork, electrical lines everywhere — you can’t just drill wherever. Use a stud finder with concrete mode, and even better, pull as-built drawings if you can get ’em. Wait, and measure twice, drill once. I’ve seen guys mark a spot, realize they hit a sprinkler line halfway through drilling, and have to move the plate 6 inches, which throws off the entire project schedule. Pro tip: Take a photo of the area before you start, share it with the electrical and plumbing guys on-site — they might spot something you missed.
Once you’ve got your spot marked, it’s time to drill the holes. This part is super specific. Use the right drill bit — diamond-tipped for concrete, not the cheap masonry bits from the hardware store. On high-rises, vibration is a big deal — the drill’s vibration can mess up nearby structural members, so use a rotary hammer with a vibration-dampening handle. And don’t just drill to the “approximate” depth — use a depth gauge on the bit. Your anchor needs to go at least 10 times the anchor diameter into the concrete. So if you’re using a 12mm anchor, drill 120mm deep. I always mark the bit with a piece of tape so I can see how deep I’m going without stopping to measure every time. Also, blow out the hole thoroughly with compressed air — concrete dust is the enemy here. If you leave even a little dust in the hole, the anchor won’t grip right. I carry a small brush too, for the bottom of the hole, to make sure it’s clean.
Now, the actual plate installation. First, lay the plate over the holes, make sure it’s level. High-rises are never perfectly flat, so use a spirit level, not just your eye. Wait for a good day if possible — wind can blow a spirit level around on an open floor, so pick a calm window. Once it’s level, put your anchors in. For high-rises, I recommend using expansion anchors with a washers and a torque wrench — not the plastic ones that come in cheap kits. The torque is non-negotiable. Follow the manufacturer’s specs, don’t guess. Too little torque and the anchor will pull out under load; too much and you’ll crack the concrete. I keep a small notebook in my tool bag to write down torque values for each plate I install — that way if there’s a problem later, I can go back and check.
Wait, hold on — there’s one more step a lot of guys skip: testing the anchors. After you torque them, do a pull test. For high-rises, you need to do at least one test per plate, or every 10 plates if you’re doing a big run. A quick pull test with a hand-operated pull gauge will tell you if the anchor is gripping right. I had a project on a 25-story office building where one anchor pulled at half the required load — turns out the concrete had a void right there. We moved the plate 2 inches and it worked, no problem. Always test, even if you think everything is right.
Now, let’s talk about high-rise-specific stuff — this is what makes this job different from any other. First, wind loads. High-rises sway, right? So your plate has to be able to handle dynamic loads, not just static weight. That means using plates with gusset plates or additional bracing if you’re mounting something heavy, like a HVAC unit or a rail. I never recommend using a flat plate for big loads on high-rises — get a plate with a raised edge or a reinforced back, it’s worth the extra 10 minutes of install time.
Then there’s floor movement. Most concrete slabs on high-rises move slightly with temperature changes and building settling. Leave a small gap between the plate and the finished surface if you’re installing it in a ceiling or a wall — like 1-2mm, that gives the concrete room to move without cracking the plate or pulling the anchors. I see guys drill holes right up to the edge of the slab on occasion — never do that. The edge of a concrete slab is the weakest point, and on high-rises, that edge is under extra stress from wind. Leave at least 50mm of space between the anchor and the slab edge.
Another thing: working at height. High-rise floors are big, but there’s a lot of open space, so never work without a harness. Also, keep your drill bits, anchors, and tools organized — don’t leave anything lying around that could fall 20 floors down. I carry a tool belt with dedicated pockets for every small part, and I never take off my harness until I’m back on solid ground at the end of the day. Plus, check with the site safety officer every morning about wind speeds — if it’s over 20 mph, drilling with a hand drill on an open floor is a bad idea.
Wait, what about when you’re installing on an exterior wall? That’s a whole other level. Exterior walls are exposed to weather, so your plate has to be corrosion-resistant. Galvanized steel is good, but for coastal high-rises, use stainless steel — salt air eats through regular steel in no time. Also, add a sealant around the plate where it meets the wall to keep water out. I use a silicone sealant rated for exterior use, and I smooth it out with a wet finger to make a tight, waterproof seal. I’ve had a client in Miami skip the sealant on a plate for a signage mount — two years later, water got in, the anchors rusted, and the sign almost fell. Don’t learn that the hard way.
Let’s talk about common mistakes I see all the time, to save you the headache. First, using the wrong drill bit. A concrete bit vs. a masonry bit is not the same. Masonry bits are for brick, concrete bits are for dense high-strength concrete. Using a masonry bit will leave rough holes and make your anchors slip. Second, not cleaning the hole. I’ve seen guys blow a hole once with their mouth — that doesn’t get all the dust. Compressed air is the only way to go, and blow both the top and the bottom of the hole. Third, ignoring testing. Pull tests aren’t a waste of time — they’re your only proof that the plate is going to hold. On high-rises, you can’t afford to skip that. Fourth, not accounting for future modifications. Leave a little extra space around the plate if you think you might need to add another component later — don’t drill so close to the edge that you can’t move things around.
Now, quick post-install checks. Once all the plates are in, go back and double-check every plate: level, torque, sealant if it’s exterior. Take photos of each plate, note the floor number and location, and keep those records. High-rises have long lifespans — 50+ years — and future maintenance guys will need to know exactly where plates are, how they were installed, and what load they’re rated for. I always give my clients a digital folder with all the install records, so they have it on hand for inspections or repairs.
Wait, and a quick note from my side as a supplier: I always tell my clients that cheap plates end up being expensive. I’ve seen a lot of guys go for the cheapest post-installed plates, only to have them rust or bend under load. My plates are made from high-grade steel, tested for wind and seismic loads (which is huge for high-rises in earthquake zones, by the way), and come with installation guides tailored for high-rise projects. I don’t do the super cheap stuff — that’s a risk you don’t want to take on a 30-story building.
Now, let’s wrap this up with what actually matters: safety and compliance. High-rise builds have strict codes, from OSHA in the US to Eurocode in Europe, so make sure your install meets all local codes. Always get the right permits before you start, and have a structural engineer sign off on the plate load ratings, especially if you’re mounting something heavy. I’ve had clients skip the engineer sign-off, only to get hit with a fine during a city inspection — that’s not worth saving a few hundred bucks.
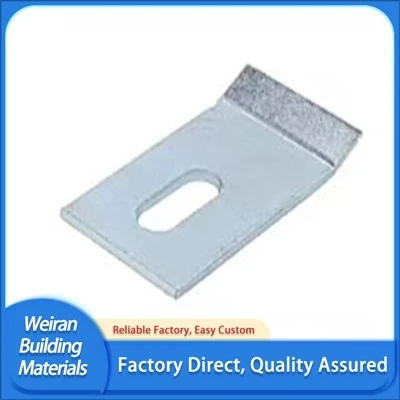
If you’re working on a high-rise and need post-installed embedded plates that are reliable, tested, and come with all the support you need for installation, hit us up. We work with contractors and engineers all over, and I’m happy to walk through the process with you, answer questions, or send a rep to your site to help with installs. Don’t cut corners here — your job’s reputation, and more importantly, the safety of everyone in that building, depends on it.
Embedded Channel References:
- American Concrete Institute (ACI) 318-19: Building Code Requirements for Structural Concrete
- International Code Council (ICC) 2021: International Building Code
- Post-Installed Anchor Manufacturers Institute (PAMI) ANSI/ASTM E1308-19: Standard Test Method for Pull-Out Strength of Concrete Anchors
- Wind Load Design for High-Rise Buildings, Council on Tall Buildings and Urban Habitat (CTBUH), 2020
- Corrosion Protection of Embedded Plates in Exterior Concrete, National Association of Corrosion Engineers (NACE), 2018
Shandong Weiran Building Materials Co., Ltd.
Shandong Weiran Building Materials Co., Ltd. is one of the most experienced post-installed embedded plate manufacturers and suppliers in China, also supports customized service with low price. Welcome to buy bulk high quality post-installed embedded plate in stock here from our factory. Contact us for quotation.
Address: No.1, Street-front Shop, Jia 19, No.137 East Xingyuan Road, Zhangdian District, Zibo City, Shandong Province, China
E-mail: qinjuan@sdwrjc.com
WebSite: https://www.sdwrjc.com/
