If you’ve ever stood on a sloped deck, balcony, or even a set of outdoor steps, you know how easy it is to feel unsteady if the railing doesn’t fit the space right. As a railing systems supplier, I’ve spent years working with homeowners, contractors, and remodelers who make the same mistake: they buy a generic railing kit and try to force it onto a slope, only to end up with gaps that are too big, posts that lean wrong, or railings that don’t meet safety codes. Installing a railing on a sloped surface isn’t just about following instructions—it’s about understanding how slope changes every step (or foot) of the way, and choosing materials that adjust to that shift without sacrificing durability or safety. Railing Systems

I remember a project two years ago for a client in the Pacific Northwest who had a 12-foot back deck sloping 12 degrees from the back door to the yard. She tried a big-box store railing kit on her own, and within three months, the top rail had pulled away from the posts by nearly an inch, and one of the posts had started to sink into the soft soil. When she called me, I showed her why the kit failed: it was made for flat surfaces, and when installed on a slope, the pressure from uneven weight (plus freezing and thawing in our region) caused the fasteners to give. Today, that same deck has a custom adjustable railing system we designed together, and it’s stood up to rain, wind, and snow for three years with no issues. That’s why I’m writing this: to walk you through the real, practical steps of installing a railing on a slope, the common pitfalls to avoid, and how to make sure your finished product looks good and works for years.
The first step, and the most important one, is to measure the slope properly. A lot of people grab a tape measure and a level, but there’s a smarter way to get accurate numbers that will save you hours of frustration later. Start at the lowest point of your sloped surface—say, the bottom of a set of outdoor steps or the back corner of your deck—and mark that with a pencil. Then move to the highest point, and hold a level horizontally between the two points. Measure the vertical difference (the drop) between the two ends of the level, and measure the horizontal distance between your two marks. Divide the vertical drop by the horizontal distance, then multiply by 100—that gives you your slope percentage. For example, a 6-foot horizontal distance with a 1-foot vertical drop is a 16.67% slope. You’ll need this number to choose the right railing components; most standard railings work up to a 30% slope, but steeper slopes need specialized materials or an extra safety barrier in some areas.
Don’t skip measuring individual sections, either. I’ve had projects where a deck sloped 10% overall, but one section near the stairs sloped 18% because of a recent grade adjustment. If you use one set of measurements for the whole space, your top rail will be uneven, creating tripping hazards or gaps that kids or pets could squeeze through. For stair railings, the code in most areas (including the U.S. IRC) says that the height of the top rail has to be consistent above each step, so measuring every step is non-negotiable.
Next, choose the right railing system for your slope. When I started in this business, we only offered two types of sloped railing systems: custom-cut wooden railings and adjustable aluminum post systems. Now, we have a range of options to fit every style and budget, so you don’t have to pay for custom work if you don’t need it. Let’s break down the main options:
First, adjustable post and rail systems. These are the most popular for slopes between 5% and 30%, and they’re ideal for DIYers or contractors who want a fast, reliable install. The posts have built-in brackets that allow you to adjust the angle of the rail as you go, so you don’t have to cut every rail to a perfect angle—each section fits right in. We supply these in aluminum, vinyl, and composite wood, so you can match your existing deck or home siding. The key here is to make sure the brackets are rated for the slope percentage of your space. A bracket rated for 15% slope won’t work on a 25% slope, so double-check that spec when you order parts.
Second, custom cut railings for steeper slopes, or for homeowners who want a seamless, built-in look. For slopes over 30%, or if you have a very uneven slope that changes direction in multiple places, custom cut rails are the way to go. We send our team or a local contractor to measure the entire space in detail, then cut each rail post at the exact angle needed to follow the slope. This takes a bit more time and costs a little more upfront, but the finished product looks like it was made for the space, not tacked on. It’s also more durable for extreme slopes because there’s no flex from adjustable brackets over time.
Third, stair-specific railings. If your sloped surface is stairs, you’ll need a system that follows the rise and run of each individual step, not just the overall slope of the entire staircase. Most building codes require stair railings to be 34 to 38 inches high, measured from the nosing (the front edge of each step) to the top of the rail. For this, we recommend a sloped rail kit designed for stairways, with pre-cut balusters that align perfectly with each step. Avoid using flat rail kits on stairs—they’ll end up too high on the top steps and too low on the bottom steps, which is a safety hazard.
Once you’ve chosen your system, it’s time to prepare the mounting points. This is where a lot of installers rush and make mistakes, so take your time here. First, mark the locations of your posts. For deck railings, posts should be spaced no more than 6 feet apart for exterior use, and set back at least 3 inches from the edge of the deck to avoid overhang. For concrete or patio slopes, posts can be mounted directly into concrete footings, but make sure the footings are sized for the slope—on a sloped surface, the post will be under more pressure from gravity, so use footings that are twice as deep as you would for a flat surface.
Before you drill any holes, check your local building codes. I can’t tell you how many clients have called me panicked because they drilled posts too close to their house, or didn’t use the right type of fasteners for a sloped exterior. Most areas require exterior railings to use corrosion-resistant fasteners—stainless steel or hot-dipped galvanized—because rain and snow will cause regular steel to rust, leading to weak posts over time. For example, in coastal areas, we always recommend 316 stainless steel fasteners, which resist saltwater corrosion far better than standard stainless steel.
Now, the actual installation process. Let’s start with adjustable post systems, since they’re the most common and DIY-friendly. First, install your end posts first—these are the posts at the top and bottom of the sloped surface, or at the corners. Secure them tightly to your footings or mounting points, then use a level to make sure they’re plumb (perfectly straight up and down), even on a slope. If a post is even slightly out of plumb, it will throw off the angle of all the rails connected to it. Once the end posts are secured, measure the distance between them and cut your first rail to fit the distance, accounting for the angle of the slope. Most adjustable rails come with pre-marked cut lines based on slope percentage, so you don’t have to calculate the angle yourself.
Next, install the intermediate posts between the end posts. On a sloped surface, you’ll need to adjust the height of the post brackets so that the top rail is level (or follows the stair slope, if it’s stairs) and the balusters are evenly spaced. For example, on a 10% slope, each intermediate post will be 1.2 inches higher than the last, so the rail stays consistent. Once all posts are in place, attach the top and bottom rails to the brackets, and install the balusters between the rails. Make sure the gap between balusters is no more than 4 inches—this is a universal safety code for railings, to prevent small children or pets from getting stuck.
For custom cut railings, the process is a bit more precise. After marking your post locations and measuring the slope at each point, cut each post at the exact angle needed to align with the top and bottom rails. For a 12-degree slope, that means the top of the post will be cut at a 12-degree angle, so the rail fits flush. We always recommend using a miter saw with a digital angle finder for this step, because a small mistake in the angle will lead to gaps between the rail and post. Once the posts are secured, attach the rails with heavy-duty wood screws or metal fasteners, then install the balusters, making sure they’re level and evenly spaced.
One common issue with sloped railings is the gap between the bottom rail and the sloped surface below. On decks, this gap can be a hazard if it’s too big, so most codes say it can’t be more than 4 inches. On stairways, the gap between the bottom rail and the step should be no more than 6 inches for most areas. If your sloped surface is uneven, you can use a flashing or a rubber seal to cover small gaps, or add a small, inconspicuous kick plate to close larger gaps (just make sure the kick plate doesn’t create a tripping hazard).
Now, finishing and maintenance. A lot of people think the hard part is over once the railing is installed, but maintaining it is key to making it last on a sloped surface, where gravity and weather put extra stress on the system. First, caulk all the seams between posts and rails, and between posts and mounting surfaces, to keep water out. On slopes, water runs down toward the bottom of the railing, so the bottom seams get the most exposure. Use a silicone or polyurethane caulk that’s rated for exterior use, and make sure it’s paintable if you want to match your railing color.
Inspect your railing twice a year—once in the spring, after winter snow and ice, and once in the fall, before heavy rain and cold set in. Check for loose posts, rusted fasteners, or gaps in the caulk. On sloped surfaces, posts can shift over time as the ground settles, so tighten any loose fasteners immediately. If you have wood railings, re-stain or seal them every two to three years, paying extra attention to the parts of the posts that get the most rain runoff. If you have aluminum or vinyl railings, just wipe them down with mild soap and water twice a year to remove dirt and debris, which can scratch the surface over time.
Let me share one more story that shows how getting this right makes all the difference. Last year, I worked with a contractor who installed a sloped aluminum railing on a backyard patio for a client. He measured the slope, used adjustable brackets rated for the slope percentage, and used stainless steel fasteners. A year later, the client sent me a photo of a party she held on the patio, and the railing looked as good as the day it was installed. She said her kids run up and down the patio without worrying about falling, which was her biggest concern when she first reached out. That’s the goal of a good sloped railing: it’s not just a safety feature, it’s something you can use without thinking about it, and that adds value to your home.
If you’re thinking about installing a railing on a sloped surface, whether it’s a deck, patio, or stairs, don’t cut corners on measuring or materials. Generic flat rail kits are designed for flat spaces, and forcing them on a slope will lead to problems down the line. As a railing systems supplier, we work with contractors and homeowners every day to find the right system for their specific slope, whether it’s a gentle 5% slope or a steep 25% stairway. We can send a representative to your site to measure for free, help you choose between adjustable or custom cut systems, and supply all the parts you need for a professional install.
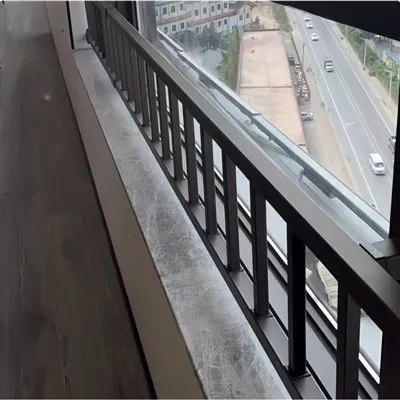
If you’re ready to get your project started, reach out to us to discuss your sloped surface, your style preferences, and your budget. We’ll walk you through every step, from measuring to installation, to make sure your new railing is safe, durable, and fits perfectly on your sloped space. Don’t settle for a generic railing that will only cause headaches—invest in a system designed for your slope, and enjoy your outdoor space for years to come.
Railing Systems References
International Code Council. (2021). International Residential Code for One- and Two-Family Dwellings.
The American Wood Council. (2020). Wood Railing Systems for Exterior Applications.
Aluminum Association. (2019). Specifications for Aluminum Railing Systems for Sloped Surfaces.
Jiangxi Hengmei New Materials Co., Ltd.
We’re well-known as one of the leading railing systems manufacturers in China, featured by quality products and good service. Please rest assured to buy bulk railing systems made in China here from our factory. We also accept customized orders.
Address: Wanfu Industrial Park, Wuning County, Jiujiang City, Jiangxi Province
E-mail: 13979274798@163.COM
WebSite: https://www.hengmeiindustry.com/
